> ## Documentation Index
> Fetch the complete documentation index at: https://developer.box.com/llms.txt
> Use this file to discover all available pages before exploring further.
# Setup with OAuth 2.0
export const SignupCTA = ({children}) => {
return ;
};
export const MultiRelatedLinks = ({sections = []}) => {
if (!sections || sections.length === 0) {
return null;
}
return
{sections.map((section, index) => )}
;
};
export const RelatedLinks = ({title, items = []}) => {
const getBadgeClass = badge => {
if (!badge) return "badge-default";
const badgeType = badge.toLowerCase().replace(/\s+/g, "-");
return `badge-${badge === "ガイド" ? "guide" : badgeType}`;
};
if (!items || items.length === 0) {
return null;
}
return ;
};
export const Link = ({href, children, className, ...props}) => {
const localizedHref = localizeLink(href);
return
{children}
;
};
A Platform App can be set up to use client-side OAuth 2.0 authentication.
## Prerequisites
To set up a Platform App using OAuth 2.0 authentication, you will need to ensure
you have access the [Developer Console][devconsole] from your Box enterprise
account. Alternatively, you may sign up for a [developer account][devaccount].
Don't have a Box account yet? A free developer account gives you access to the Developer Console, where you can create and configure OAuth 2.0 applications.
## App creation steps
### Navigate to the Developer Console
Log into Box and go to the
[Developer Console][devconsole]. Select **Platform Apps**, then click **New App**.
### Create a new app
On the **Create a New App** screen, enter your app name
and select **OAuth 2.0** from the **App Type** dropdown.
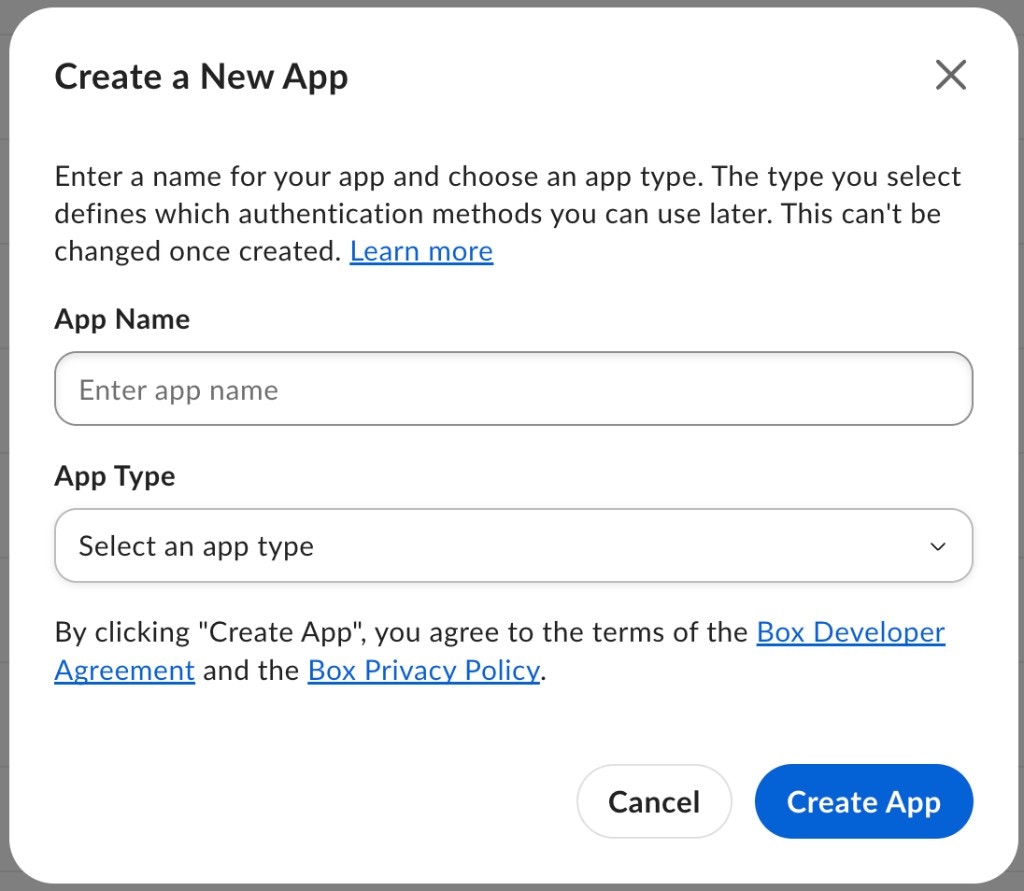 Once you make a selection, you will not be able to change to a different
authentication method without creating a new application.
## Basic configuration
Before the application can be used, some additional configuration is
required.
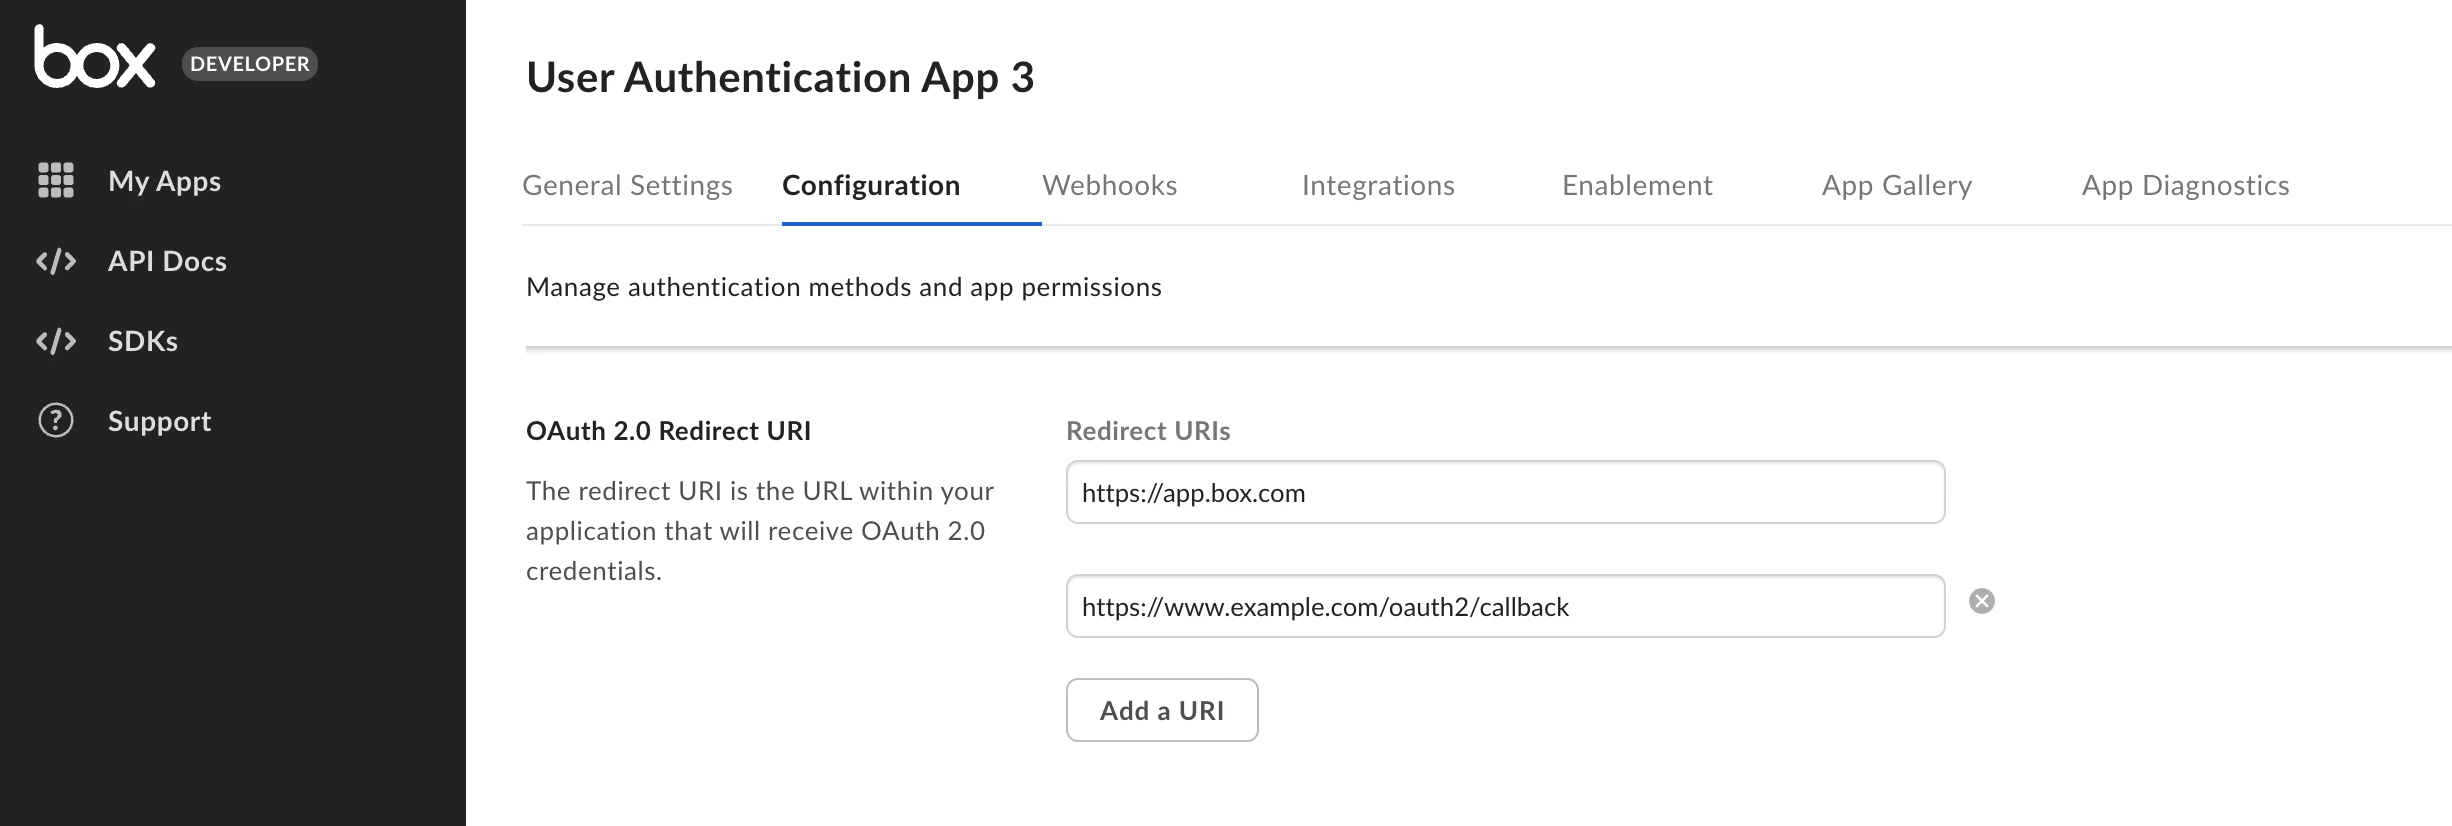
### Redirect URI
During the OAuth 2.0 flow, users are redirected to their browser to
authenticate and then authorize the application to take actions on their behalf.
Prior to redirecting the user, Box verifies that the `redirect_uri` parameter
passed into the authorization URL matches one of the redirect
URIs configured for the application. This will be an exact match check, meaning
the URIs must be exactly the same. Localhost and loopback address redirect URIs
will be permitted redirect to any port, but the scheme, domain, path and query
parameters must match one of the configured URIs.
You can configure these under the OAuth 2.0 Redirect URI section on the
Configuration page in the developer console. These must be valid URIs that are
HTTPS, or a less secure HTTP for localhost or loopback address. We do not
permit duplicate URIs to be saved.
Starting November 29, 2021, new applications using OAuth 2.0 will
require the URIs set in the configuration tab of the Developer Console to
strictly match the one used during redirect. In addition, both new and
existing applications, will gain the ability to add multiple redirect URIs.
If you configured multiple redirect URIs for the application,
the authorization URL must include the `redirect_uri` parameter matching one
of the URIs configured in the developer console.
If the parameter is not specified, the user will see a `redirect_uri_missing`
error and will not be redirected back to the app after granting application
access.
For existing applications, the deadline to make changes to this URL to avoid
service disruption is May 13, 2022.
Once you make a selection, you will not be able to change to a different
authentication method without creating a new application.
## Basic configuration
Before the application can be used, some additional configuration is
required.
### Redirect URI
During the OAuth 2.0 flow, users are redirected to their browser to
authenticate and then authorize the application to take actions on their behalf.
Prior to redirecting the user, Box verifies that the `redirect_uri` parameter
passed into the authorization URL matches one of the redirect
URIs configured for the application. This will be an exact match check, meaning
the URIs must be exactly the same. Localhost and loopback address redirect URIs
will be permitted redirect to any port, but the scheme, domain, path and query
parameters must match one of the configured URIs.
You can configure these under the OAuth 2.0 Redirect URI section on the
Configuration page in the developer console. These must be valid URIs that are
HTTPS, or a less secure HTTP for localhost or loopback address. We do not
permit duplicate URIs to be saved.
Starting November 29, 2021, new applications using OAuth 2.0 will
require the URIs set in the configuration tab of the Developer Console to
strictly match the one used during redirect. In addition, both new and
existing applications, will gain the ability to add multiple redirect URIs.
If you configured multiple redirect URIs for the application,
the authorization URL must include the `redirect_uri` parameter matching one
of the URIs configured in the developer console.
If the parameter is not specified, the user will see a `redirect_uri_missing`
error and will not be redirected back to the app after granting application
access.
For existing applications, the deadline to make changes to this URL to avoid
service disruption is May 13, 2022.
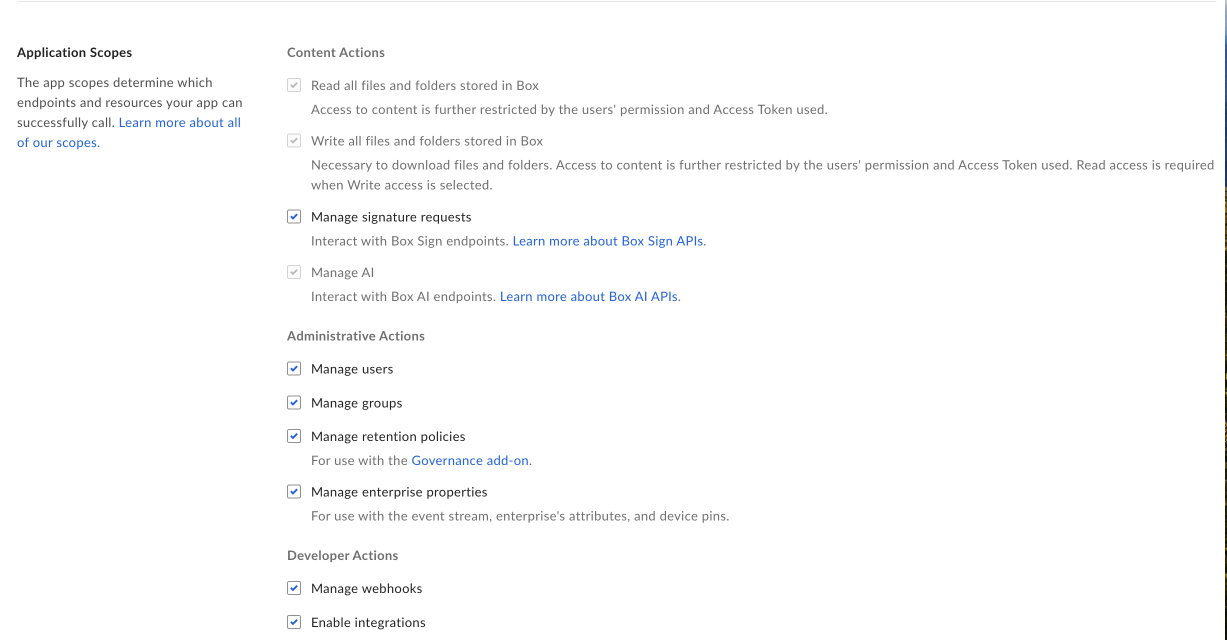
 ### Application Scopes
Scopes define what permissions your application has in order to access data. See
the scopes guide for detailed information on each option.
### Application Scopes
Scopes define what permissions your application has in order to access data. See
the scopes guide for detailed information on each option.
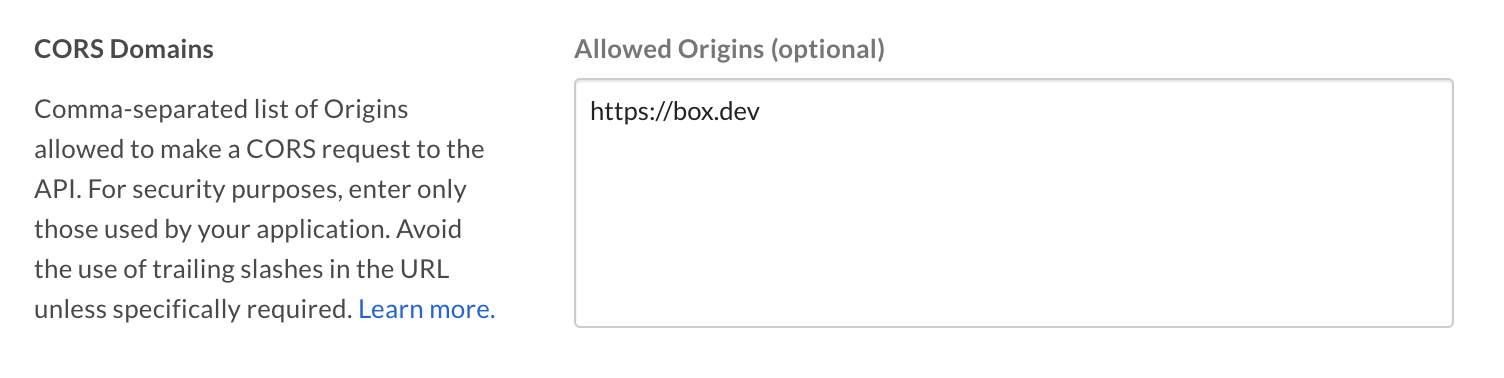
 ### CORS Domains
If your application makes API calls from front-end browser code in
Javascript, the domain that these calls are made from will need to be
added to an allow-list due to [Cross Origin Resource Sharing][cors],
also known as CORS. If all requests will be made from server-side code,
you may skip this section.
To add the full URI(s) to the allow-list, navigate to the **CORS Domain**
section at the bottom of the **Configuration** tab in the
[Developer Console][devconsole].
### CORS Domains
If your application makes API calls from front-end browser code in
Javascript, the domain that these calls are made from will need to be
added to an allow-list due to [Cross Origin Resource Sharing][cors],
also known as CORS. If all requests will be made from server-side code,
you may skip this section.
To add the full URI(s) to the allow-list, navigate to the **CORS Domain**
section at the bottom of the **Configuration** tab in the
[Developer Console][devconsole].
 [devconsole]: https://app.box.com/developers/console
[devaccount]: https://account.box.com/signup/n/developer
[devtoken]: /guides/authentication/tokens/developer-tokens
[cors]: https://en.wikipedia.org/wiki/Cross-origin_resource_sharing
[devconsole]: https://app.box.com/developers/console
[devaccount]: https://account.box.com/signup/n/developer
[devtoken]: /guides/authentication/tokens/developer-tokens
[cors]: https://en.wikipedia.org/wiki/Cross-origin_resource_sharing