> ## Documentation Index
> Fetch the complete documentation index at: https://developer.box.com/llms.txt
> Use this file to discover all available pages before exploring further.

> Platformアプリを設定し、認証を行って、Box AI Studio APIを使用したカスタムAIエージェントの作成を開始します。

# AI Studioの使い方

export const MultiRelatedLinks = ({sections = []}) => {
  if (!sections || sections.length === 0) {
    return null;
  }
  return <div className="space-y-8">
      {sections.map((section, index) => <RelatedLinks key={index} title={section.title} items={section.items} />)}
    </div>;
};

export const RelatedLinks = ({title, items = []}) => {
  const getBadgeClass = badge => {
    if (!badge) return "badge-default";
    const badgeType = badge.toLowerCase().replace(/\s+/g, "-");
    return `badge-${badge === "ガイド" ? "guide" : badgeType}`;
  };
  if (!items || items.length === 0) {
    return null;
  }
  return <div className="my-8">
      {}
      <h3 className="text-sm font-bold uppercase tracking-wider mb-4">{title}</h3>

      {}
      <div className="flex flex-col gap-3">
        {items.map((item, index) => <a key={index} href={item.href} className="py-2 px-3 rounded related_link hover:bg-[#f2f2f2] dark:hover:bg-[#111827] flex items-center gap-3 group no-underline hover:no-underline border-b-0">
            {}
            <span className={`px-2 py-1 rounded-full text-xs font-semibold uppercase tracking-wide flex-shrink-0 ${getBadgeClass(item.badge)}`}>
              {item.badge}
            </span>

            {}
            <span className="text-base">{item.label}</span>
          </a>)}
      </div>
    </div>;
};

export const Link = ({href, children, className, ...props}) => {
  const localizedHref = localizeLink(href);
  return <a href={localizedHref} className={className} {...props}>
      {children}
    </a>;
};

<Warning>
  Box AI Studioは、Enterprise Advancedアカウントでのみ使用できます。
</Warning>

AI StudioでカスタムAIエージェントを作成するには、Box AIスコープが有効になっているPlatformアプリケーションと、APIコールを認証するためのトークンが必要です。

<Note>
  以下の設定手順は、<Link href="/guides/box-ai/ai-tutorials/prerequisites">Box AI APIの前提条件</Link>の手順と似ています。その手順をすでに完了している場合は、\[**AIを管理する**] のスコープが有効になっていること、また管理者がAI Studioを有効にしていることを確認し、[次の手順](#next-steps)に進んでください。
</Note>

<Steps>
  <Step title="Platformアプリケーションの作成">
    APIコールを行うPlatformアプリを作成します。<Link href="/guides/applications/platform-apps/create">Platformアプリの作成</Link>に関するガイドに従ってください。
  </Step>

  <Step title="AI Studioの有効化">
    Box管理者に対して、管理コンソールでAI Studioを有効にするように依頼します。管理者側の手順については、[Box AI Studioの有効化とエージェントの管理][enable]を参照してください。
  </Step>

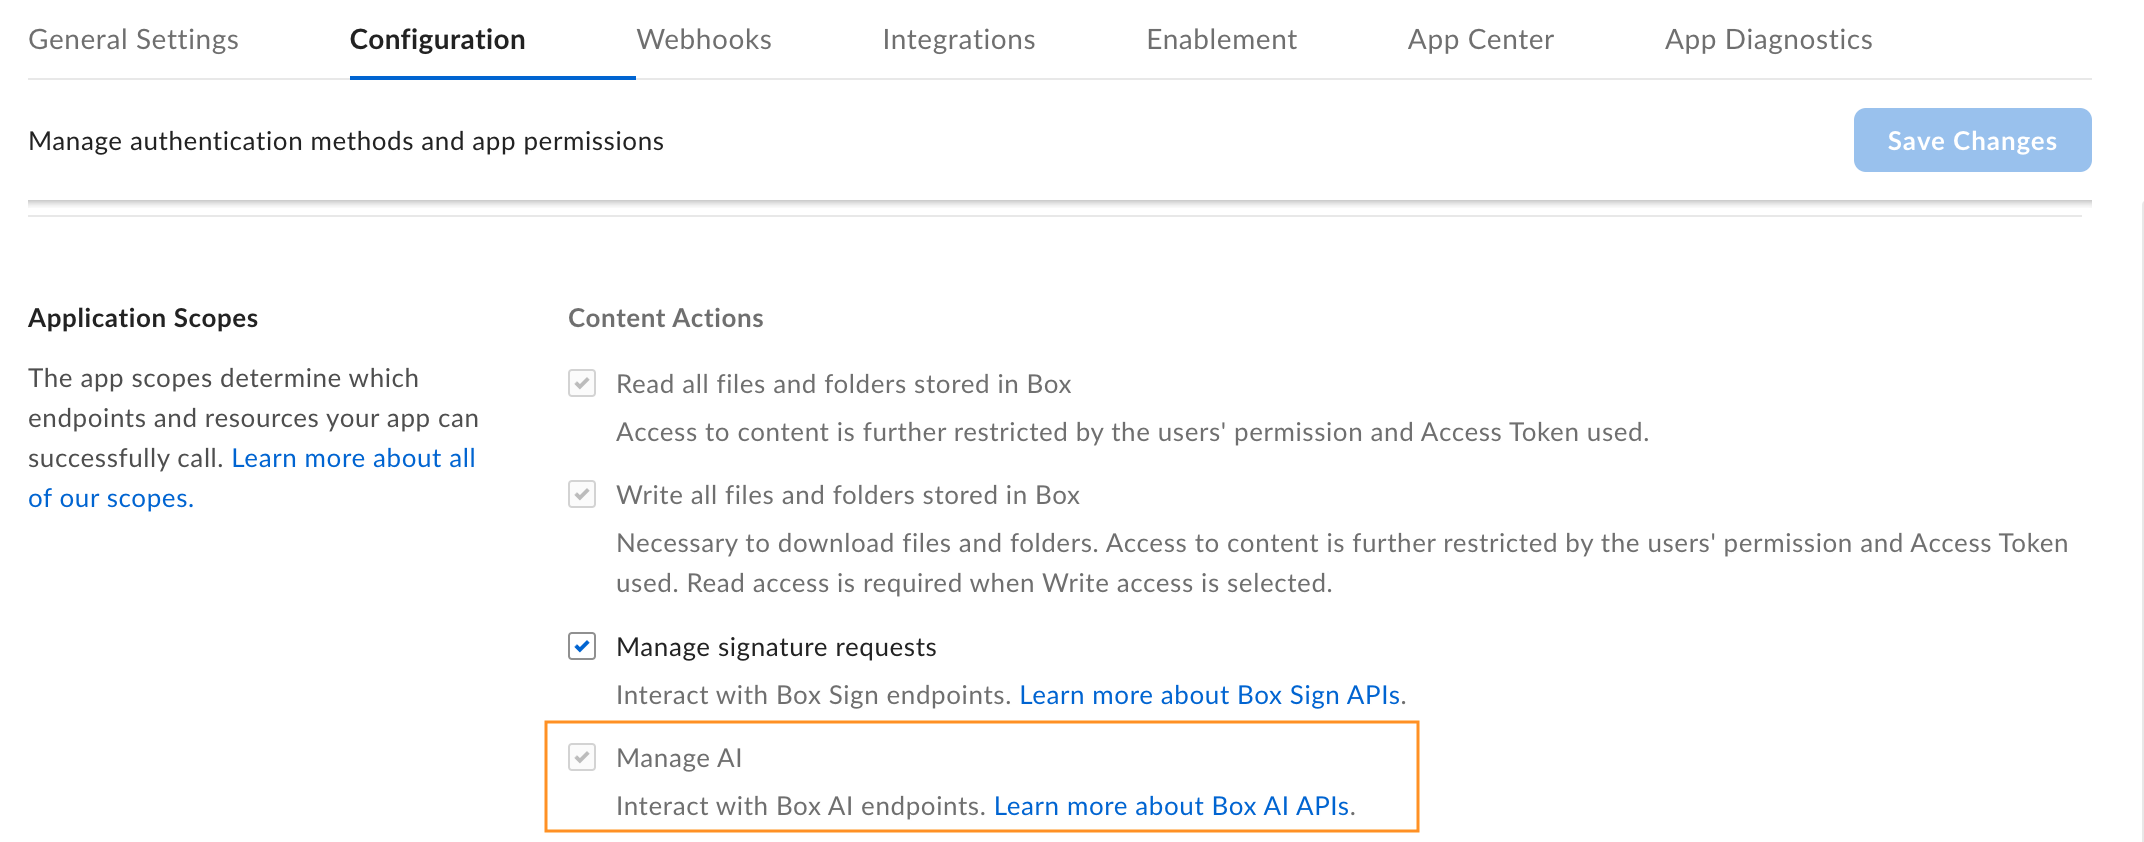
  <Step title="AIスコープの追加">
    Box AI APIを操作するには、アプリケーションに`ai.readwrite`<Link href="/guides/api-calls/permissions-and-errors/scopes">スコープ</Link>を追加します。

    1. 開発者コンソールで、目的のアプリケーションを開きます。
    2. \[**構成**] > \[**必須のアクセススコープ**] > \[**コンテンツ操作**] に移動します。
    3. \[**AIを管理する**] を選択します。

    <Frame>
      <img src="https://mintcdn.com/box/Z1XcLZTI-opBQvuM/images/guides/ai-studio/box-ai-app-scopes.png?fit=max&auto=format&n=Z1XcLZTI-opBQvuM&q=85&s=3a247bbcee4adfdaeb6e1d793dd927af" alt="Box AIのスコープ" width="2144" height="842" data-path="images/guides/ai-studio/box-ai-app-scopes.png" />
    </Frame>

    <Note>
      \[**AIを管理する**] というオプションが表示されない場合は、管理者に連絡してBox AI APIへのアクセス権限を付与してもらいます。スコープのチェックボックスがオンの状態でグレー表示になっている場合は、アプリ所有者のスコープが有効になっていますが設定を変更できなくなっています。
    </Note>
  </Step>

  <Step title="アプリケーションの承認">
    <Link href="/guides/authorization">承認または有効化</Link>のためにアプリを送信します。既存のアプリケーションに対してBox AIを有効にする場合は、アプリケーションを<Link href="/guides/authorization/platform-app-approval#re-authorization-on-changes">再承認</Link>する必要があります。
  </Step>

  <Step title="開発者トークンの生成">
    自分のリクエストを認証するための開発者トークンを生成します。

    1. \[**開発者コンソール**] > \[**Platformアプリ**] に移動します。
    2. Platformアプリにカーソルを合わせ、右側の**オプションメニュー**ボタン (\[...]) を選択します。
    3. \[**開発者トークンを生成**] を選択します。トークンが自動的にクリップボードにコピーされます。

    <Warning>
      開発者トークンは1時間のみ有効です。実稼働環境では、アプリの構成済みの認証方法 (例: <Link href="/guides/authentication/oauth2">OAuth 2.0</Link>または<Link href="/guides/authentication/client-credentials">クライアント資格情報許可</Link>) を使用してください。
    </Warning>

    詳細については、<Link href="/guides/authentication/tokens/developer-tokens">開発者トークン</Link>を参照してください。
  </Step>
</Steps>

## 次の手順

アプリケーションの構成が完了し、トークンが生成されたら、カスタムAIエージェントの作成を開始できます。APIコールには、cURL、Postman、<Link href="/sdks-and-tools">Box SDK</Link>のいずれかを使用してください。

<CardGroup cols={2}>
  <Card title="エージェントの作成" icon="robot" href={localizeLink("/guides/ai-studio/ai-studio-agents/create-agents")} arrow="true">
    特定の機能とアクセス制御を備えたカスタムAIエージェントを定義します。
  </Card>

  <Card title="エージェントのリストの取得" icon="list" href={localizeLink("/guides/ai-studio/ai-studio-agents/get-agents")} arrow="true">
    組織内のすべてのAIエージェントのリストを取得します。
  </Card>
</CardGroup>

[enable]: https://support.box.com/hc/en-us/articles/37228079461267-Enabling-Box-AI-Studio-and-Managing-Agents/#h_01JH9HAMP43YYN6VWM51QCK413