Learn how JWT authentication works
Prerequisites
To set up a Platform App using JWT, you need to ensure you have access to the Developer Console from your Box enterprise account. Alternatively, you may sign up for a developer account.App creation steps
Create a Server Authentication app
- Log into Box and go to the Developer Console.
- Select New App.
- Select Server as the app type.
- Select JWT under Select Method.
- Select Create.
Select JWT as the authentication method
The Create a New App dialog preselects Client Credentials Grant, so you have to choose JWT yourself before you create the app. The Switch server app auth type (CCG or JWT) setting decides whether you can change the method afterward. It is enabled by default for free developer accounts, where you can also convert an existing Client Credentials Grant app: open the Configuration tab and change the authentication method to JWT. It is disabled by default for enterprises, where the method is fixed once the app exists.When switching is enabled, you can change between JWT and
at any time from the Configuration tab. See
for details on credential handling and downtime considerations.
Public and private key pair
Once your app is configured to use JWT, a key pair can be generated via the Configuration tab in the Developer Console. Alternatively, you can generate your own and supply Box with the public key. Regardless of the method you select, your Box account needs to have 2FA enabled for security purposes.Generate a keypair (recommended)
If you would like to use a Box generated keypair, navigate to the Developer Console where you can generate a configuration file. This file includes a public/private keypair and a number of other application details that are necessary for authentication. To generate this file, navigate to the Configuration tab of the Developer Console and scroll down to the Add and Manage Public Keys section.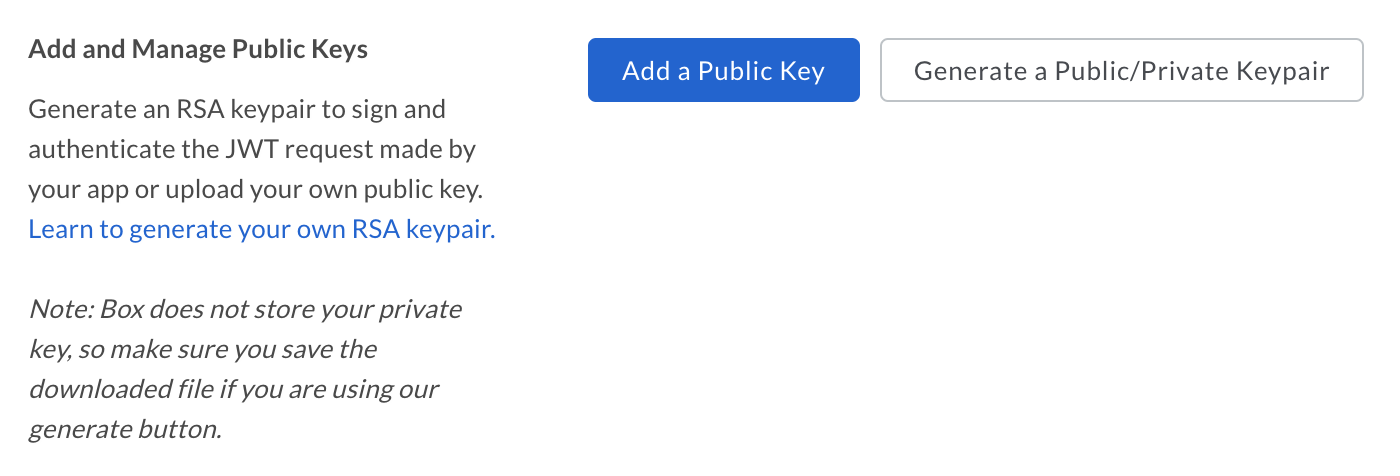
For security reasons, Box does not store your private key. If you lose your
private key, you need to reset the entire keypair.
Manually add keypair
Alternatively, you may generate your own keypair and upload the public key to the Developer Console. To create a keypair using OpenSSL, open a terminal window and run the following commands.For Windows SystemsWindows users can install and use the Cygwin package to run OpenSSL.
App authorization
Server authentication applications must be authorized before use. The authorization process depends on your account type. Free developer accounts: Your app is automatically authorized when you create it. If authorization did not complete, the Configuration tab displays a prompt to authorize the app. Enterprise accounts: After you create the app, the Configuration tab prompts you to submit the app for admin approval. Enterprise admins and co-admins: The Configuration tab lets you authorize the app directly after creation.Learn more about the authorization process
Basic configuration
Application access
An application’s access level determines which users and content your app may access. By default, an application can only successfully interact with the content of its and any . To access existing Managed Users of an enterprise and groups that were not created by the app itself, navigate to the App Access Level setting accessible on the Configuration tab of the Developer console and set to App + Enterprise Access. Otherwise, access to such Managed Users and groups is blocked.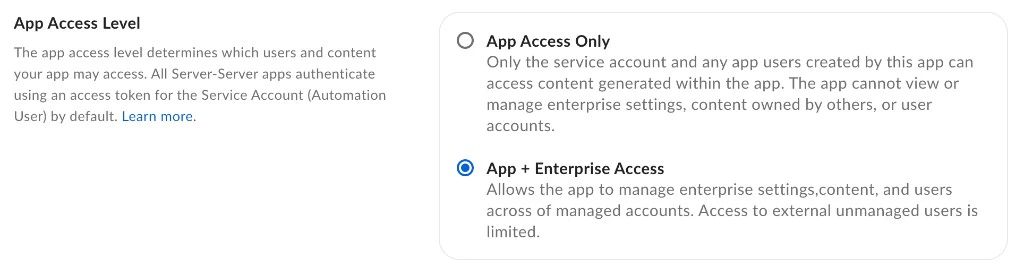
Application scopes
An application’s scopes determine which endpoints and resources an application can successfully call. See the for detailed information on each option.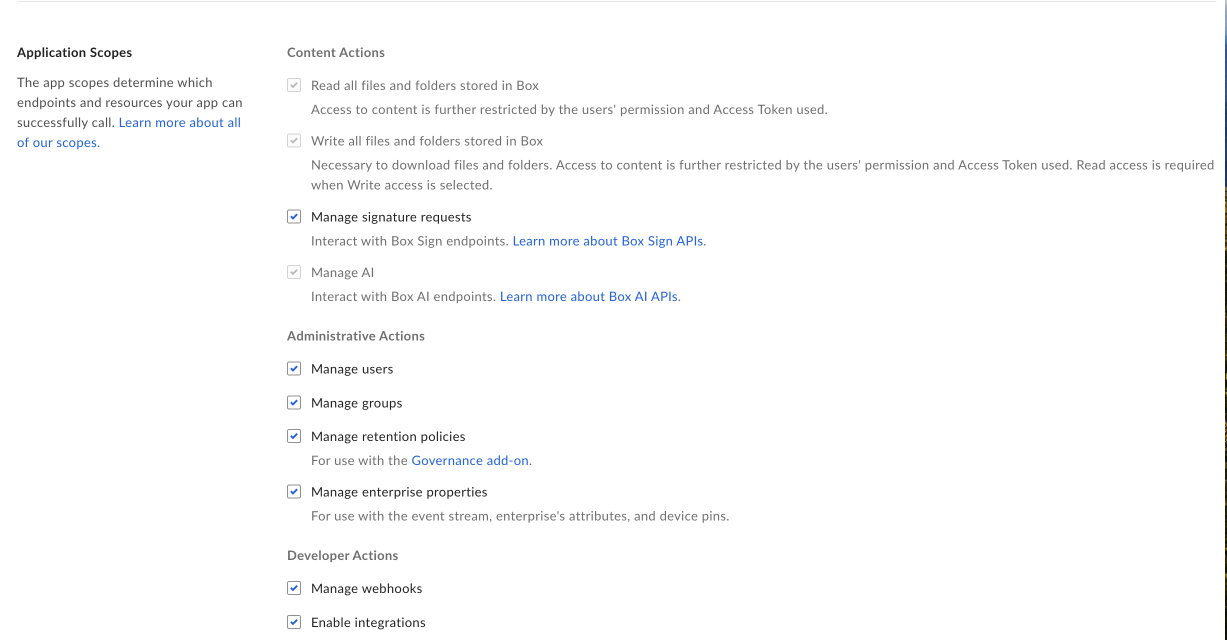
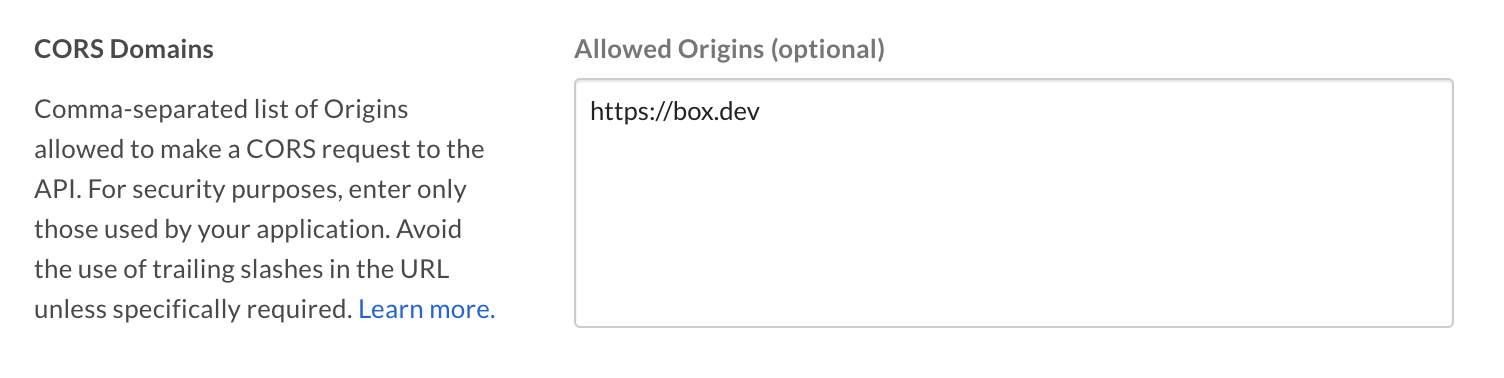
CORS domains
If your application makes API calls from front-end browser code in Javascript, the domain that these calls are made from needs to be added to an allow-list due to Cross Origin Resource Sharing, also known as CORS. If all requests are made from server-side code, you may skip this section. To add the full URI(s) to the allow-list, navigate to the CORS Domain section at the bottom of the Configuration tab in the Developer console.