

Clone the working sample
Prefer to start from running code? The setup script and webpage built in this tutorial are on GitHub. Clone the repo, add your Box credentials, and run.
What you are building
By the end of this tutorial, you have:- A minimal
Invoicemetadata template created entirely from code. - The invoice files in your folder tagged with vendor, invoice number, amount, and status — values that Box AI reads from the documents themselves.
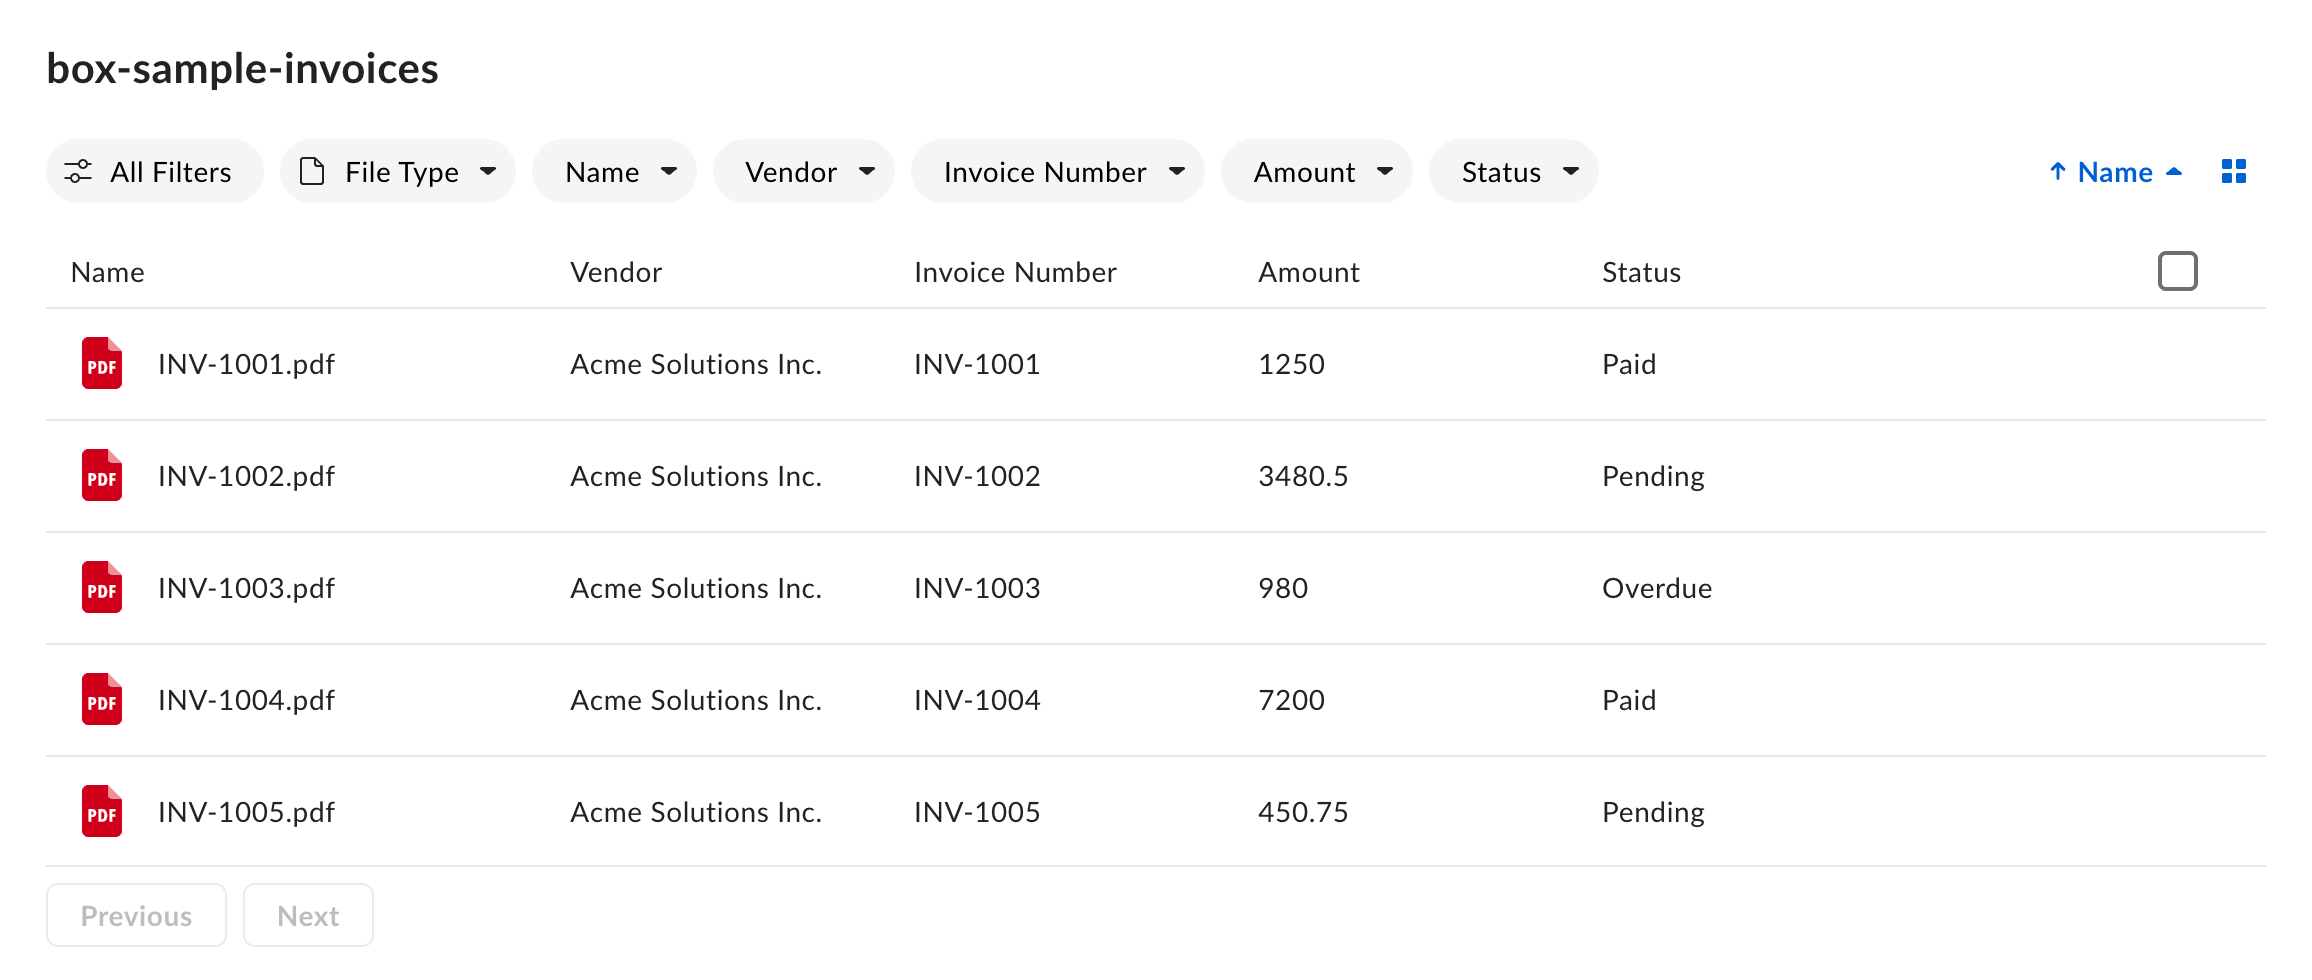
- A single HTML page that embeds the Content Explorer metadata view (v2) so you can filter, sort, and edit those invoices in the browser.
Prerequisites
Before you start, you need:- A free . It gives you admin rights in your own Box environment, which lets you create metadata templates, and it includes free AI units this tutorial uses.
- A platform app that uses User Authentication (OAuth 2.0) in the . See .
- A Box folder that contains a few invoice files in a format Box AI can read, such as PDF, DOCX, or a scanned image. See . Note the folder ID from the URL. For example, for
https://app.box.com/folder/123456789, the ID is123456789. - Node.js 22 or later.
- In the Box web app, open the folder and select Upload > Files, or drag the files onto the folder.
- From the API, upload each file to the folder ID you noted. See .
Step-by-step process
This tutorial uses four Box capabilities:1
Allowlist localhost and get a developer token
- Open your app in the .
- Go to Configuration > CORS Domains and add the origin you serve the page from:
-
In Configuration > Application Scopes, enable the following scopes:
- Read and write all files and folders stored in Box
- Manage AI
- Select Save Changes.
- In Configuration > App Details > Access, locate the Developer Token field, select Generate Developer Token, and copy the value. You need it in the next steps.
Generate the token last. If you change and save your app configuration afterwards, generate a fresh token before you carry on.
2
Set up the project and run the setup script
- Create a project directory and install the SDK:
The package installs the Box Node SDK and the Box CLI as direct dependencies. Existing projects can keep using
npm install box-node-sdk.- In the project directory, create a file called
.envthat holds your credentials, so they stay out of your code:
- In the same directory, create a file called
setup.jsand paste the following code. The script creates the , asks Box AI to read those fields out of each document in your folder, writes the results back as metadata, and prints the configuration values the webpage needs.
- Run the script. Node reads your credentials straight out of
.env:
Passing
metadataTemplate instead of fields means the template you just created also serves as the extraction schema, so Box AI returns values that already match the field keys and types the metadata view expects. Box AI leaves off anything it can’t find, and you can fill those fields in manually in the metadata view after it loads.You create templates in the
enterprise scope, and the API returns that scope as enterprise_123456, where the number is your enterprise ID. Other scopes exist, such as the read-only global scope that holds global.properties, so don’t hard-code the enterprise_ prefix. The metadata view needs the full scope.templateKey string, which the script prints for you. See .3
Create the webpage
Create a file called
index.html in the same directory. Replace the three placeholder values at the top of the script (ACCESS_TOKEN, FOLDER_ID, and METADATA_FROM) with your developer token and the values the setup script printed.This page reads its token from the file rather than from
.env, because a static page has no server to read .env for it. Every UI Element needs a token in the browser, so production apps mint a downscoped one server-side instead of shipping the file. See Scaling to production.The column
type values use the metadata view’s own vocabulary, which differs slightly from the template field types: a template float field maps to a number column, and an enum field maps to a singleSelect column. The supported column types are string, number, date, singleSelect, and multiSelect.4
Serve the page and explore
Serve the static HTML over HTTP so the origin matches your CORS allowlist. Don’t open the HTML file directly in the browser (for example, with a Go to . The page shows your invoices in a metadata table. From here you can:
file:// URL). From the project directory, start a static server on port 8080:npx downloads serve the first time you run it and asks you to confirm. Any static server works, as long as it serves the page on the port you allowlisted. If port 8080 is already in use, serve starts on a different port and prints that address instead, so check its output before you go to the page: a different port is a different origin, and Box rejects the API calls.- Filter by vendor, amount, or status by using the filter chips in the action bar.
- Sort any column by selecting its header.
- Toggle between list and grid layouts.
- Select a row, and then select Metadata in the header and Edit in the panel that opens. You edit values in that panel, not in the grid cells.
Troubleshooting
403 Forbidden in the browser console (calls to api.box.com)
403 Forbidden in the browser console (calls to api.box.com)
The serving origin isn’t on the CORS allowlist. Add the exact origin you opened (for example,
http://localhost:8080) under CORS Domains in the Developer Console, select Save Changes, wait a minute, and then reload. Remember that localhost and 127.0.0.1 are different origins, and that a static server falls back to another port when the one you asked for is taken, so confirm the address your server printed.Box AI returned no fields, or the wrong ones
Box AI returned no fields, or the wrong ones
Box AI reads text from a broad range of documents, images, and spreadsheets, and applies OCR to image files and scanned documents, but a file in an unsupported format returns nothing. Check your files against the . If the file is readable but the values are off, the layout may be ambiguous. Add a
description to each template field, or switch from metadataTemplate to an explicit fields array, where each field also takes a prompt that describes how to find and format the value. See .The script skips every file with a 409 conflict
The script skips every file with a 409 conflict
The files already carry the
Invoice template, which is what happens when you run setup.js a second time. Writing metadata fails when an instance already exists, so the script reports 409 tuple_already_exists and keeps the values already on the file. Those values still appear in the metadata view, so you can safely ignore a repeat run. To extract everything again, remove the existing metadata first, either from the metadata panel in the Box web app or with , and then run setup.js again.The table is empty
The table is empty
Confirm that
METADATA_FROM matches the scope.templateKey the setup script printed, and that FOLDER_ID is the folder that contains your invoices. The metadataQuery.from and ancestor_folder_id values must point to the folder that holds the tagged files.Nothing renders, or the console shows Box is not defined
Nothing renders, or the console shows Box is not defined
The CDN scripts didn’t load, or the version is too old. The metadata view v2 requires Box UI Elements v24.0.0 or higher. Check the
explorer.js and explorer.css URLs and your network tab.You don't have permission to create metadata templates
You don't have permission to create metadata templates
A developer token belongs to the account you were signed in with when you generated it in the Developer Console. If you were signed in as a different Box user, the token doesn’t carry the admin rights that template creation needs. Sign in with your developer account, generate a fresh token, and then run the script again.
Scaling to production
Replace the developer token with a real authentication flow
Replace the developer token with a real authentication flow
Developer tokens are for prototyping only. In production, mint a short-lived, downscoped token server-side and pass it to the browser; never ship a full-privilege token to the client. See and .
Tag documents as they arrive
Tag documents as they arrive
This script extracts metadata for a folder on demand. In production, trigger the same extraction from a
FILE.UPLOADED webhook so every new document is tagged when it arrives, and the metadata view stays current without anyone running a script. See .Improve extraction accuracy
Improve extraction accuracy
For dense or inconsistent documents, replace
metadataTemplate with an explicit fields array so you can attach a description and prompt to each field, request confidence scores with includeConfidenceScore, and route low-confidence results to a human. The Enhanced Extract Agent handles longer and more complex documents. See .Filter the query server-side
Filter the query server-side
For large folders, narrow the result set with the
query and query_params fields of metadataQuery (for example, only Overdue invoices). See the .Use React instead of the CDN
Use React instead of the CDN
For a componentized app, import
ContentExplorer from the box-ui-elements package and pass the same metadataQuery and metadataViewProps. You get an embeddable dashboard component you can drop into an existing app. See the React setup in the .Next steps
Invoice intake automation
Run the same extraction from a webhook so documents are tagged as they arrive, instead of on demand.
Metadata view v2 guide
See every configuration option for the enhanced Content Explorer metadata view.