

You can generate
embedded_metadata representations for any file type in Box. The set of attributes depends on the file. Not every file includes every EXIF, JFIF, ICC, or MakerNotes field, and some tools strip this data, so not all files return useful metadata.Before you start
Complete these Box setup steps before you build. You need:- A , or a .
- A Box application configured with Client Credentials Grant authentication, authorized in the Admin Console, with this scope:
- Read and write all files and folders stored in Box
- Python 3.11 or higher. For the agent path, you can also use Node.js 20+, Java 17+, or .NET 8+.
- For the agent path, a coding agent such as Codex, Claude Code, or Cursor. Installing helps it use current Box APIs.
.env file need them.
Embedded metadata is available for any format Box can already . The set of attributes depends on the file. Not every image includes every EXIF, JFIF, ICC, or MakerNotes field, and some tools strip this data.
embedded_metadata is an on-demand representation: Box generates it the first time you request it.1. Create the metadata template
1. Create the metadata template
The metadata template defines the fields you copy from the representation. Create it once, and every file the script processes writes values in this shape.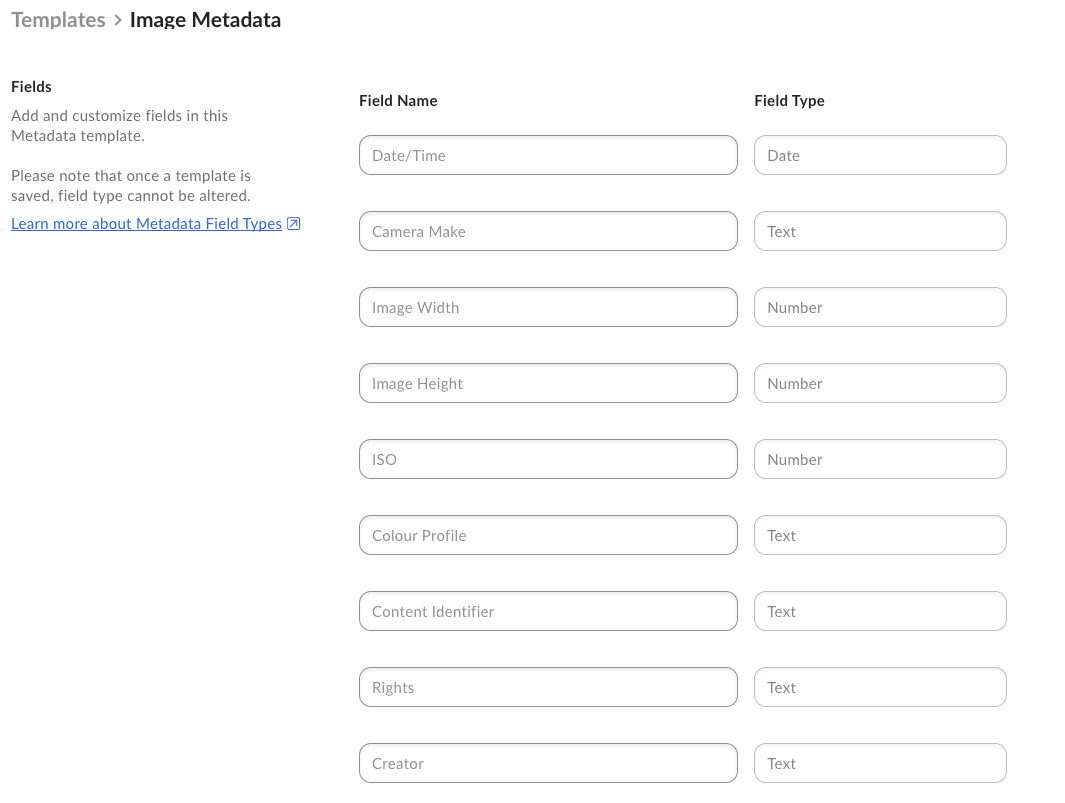
- Open the Box Admin Console and select Metadata.
- Select New and name it
Image Metadata. - Add the following fields:
- Copy the template key from under the Template Name. You need it for the prompt and for
.env. Box also generates a field key from each field name (for example, Camera Make becomescameraMake). Use those keys in the script. - Select Save.
2. Create the photos folder
2. Create the photos folder
Create a dedicated folder in Box for the images you want on the dashboard.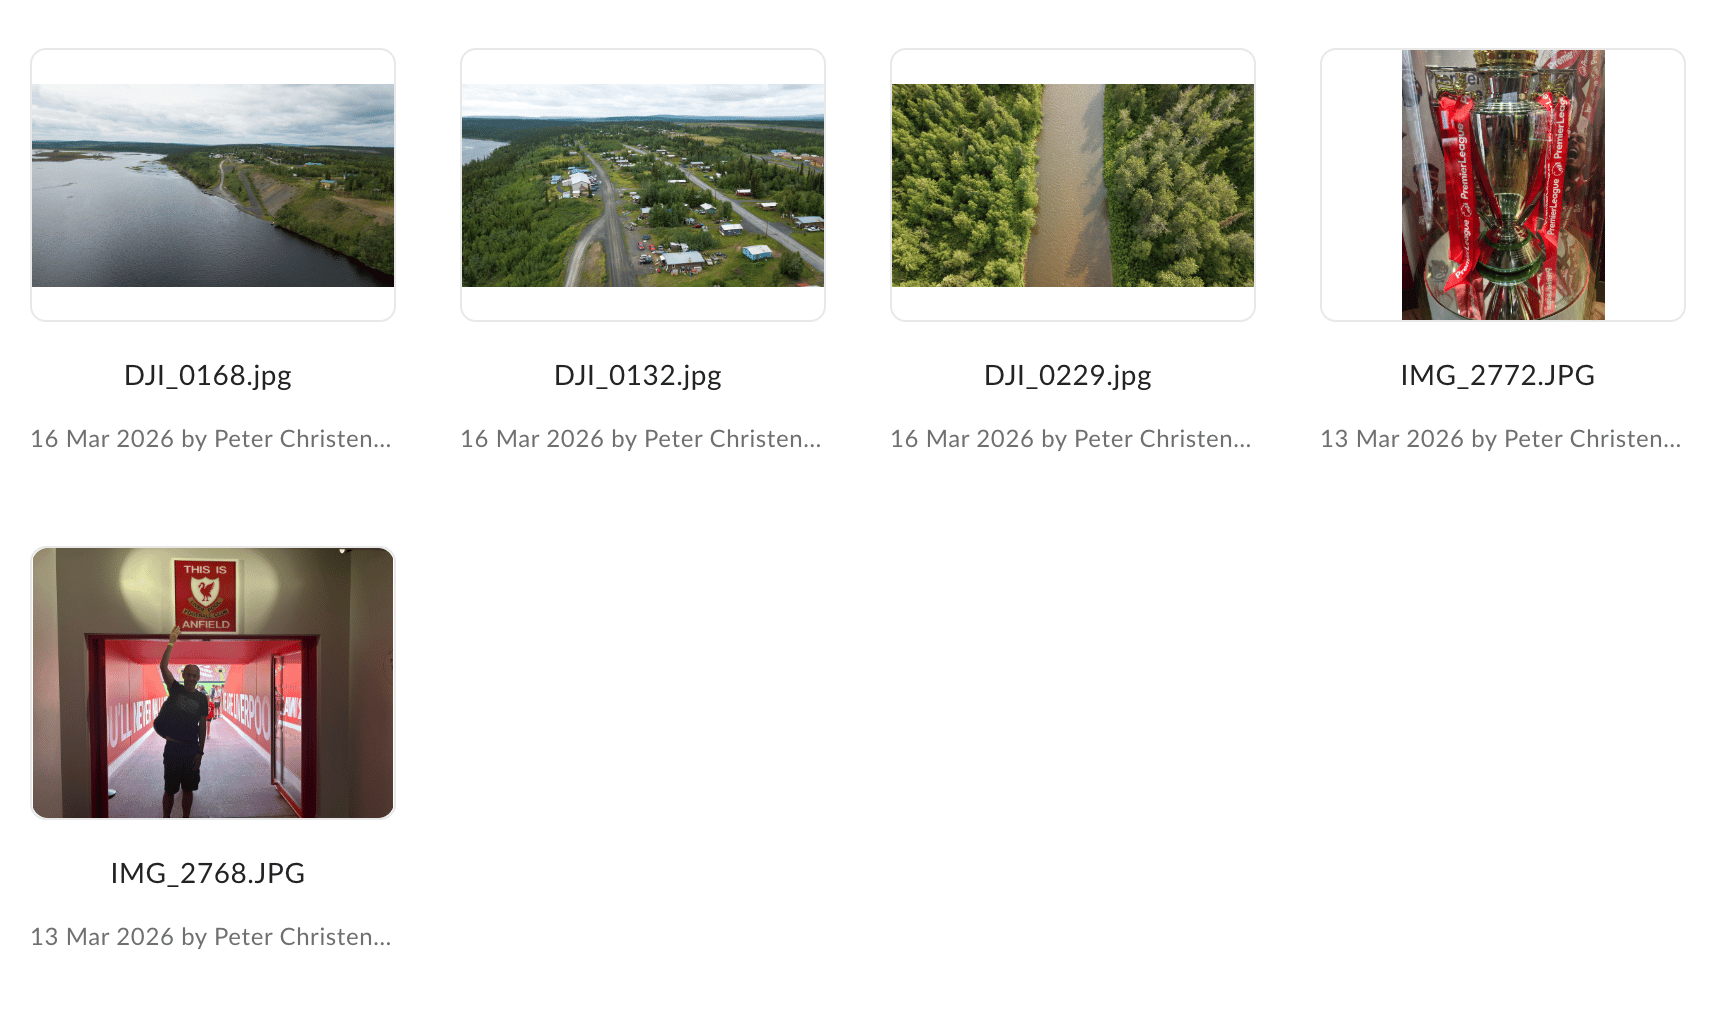
- In Box, create a new folder called
Photos. - Upload previewable image files to the folder.
- Note the folder ID from the URL. For example, if the URL is
https://app.box.com/folder/123456789, the folder ID is123456789. - Share the folder with your application’s service account. This is required because CCG applications act as a separate service account user that does not automatically have access to your content.
Build with an agent
Gather these values from Before you start:- Metadata template key – from the template you created
- Photos folder ID – from the folder URL
- Enterprise ID – from the Developer Console, using the icon in the top-right
<TEMPLATE_KEY>, <FOLDER_ID>, and <ENTERPRISE_ID> placeholders if you want the agent to pre-fill .env. Otherwise, leave them and fill .env yourself after scaffolding.
Python + Script
Python + FastAPI
TypeScript + Node
TypeScript + Fastify
Node + Script
Node + NestJS
Java + CLI
Java + Spring Boot
.NET + Console
.NET + ASP.NET Core
Review generated code before using it in production. Never paste Box credentials into your coding agent.
.env.example to .env and fill in your client ID, client secret, enterprise ID, metadata template key, and folder ID. Then skip ahead to Run and verify.
You can also clone a working sample if you prefer to start from running code:
Python working sample
Clone the sample, add your Box credentials, and run.
Build by hand
Use this path if you prefer to write the code yourself, or if you need a reference when the agent drifts. Complete Before you start first, then follow the steps in order. The samples use the Box Python SDK v10.1. Set up the development environment
1. Set up the development environment
- Open your terminal and create a new project directory:
- Install dependencies:
After activation, your terminal prompt shows
(.venv) at the beginning. Every time you open a new terminal window or tab, re-activate the virtual environment with source .venv/bin/activate from the project directory. If you see ModuleNotFoundError, the venv is usually not activated.- Create a
.envfile to store your credentials, then add the following content. Replace the placeholder values with your actual credentials from the Box Developer Console:
2. Authenticate the Box client
2. Authenticate the Box client
Create the Box client module in your project directory:
3. Work with representations
3. Work with representations
Create Example Call The downloaded body is JSON. A JPEG can look like this (many fields omitted):One sample file produced 114 data points. Files differ in which categories and fields they include.
representations.py. list_representations prints every representation Box can generate for that file. fetch_representation requests a specific one with x_rep_hints. Use [embedded_metadata]. You can request more than one representation in a single call by combining hints in that value.A none state means Box has not generated the representation yet. The Box Python SDK does not start or download that representation for you. After get_file_by_id returns the info and content URLs, fetch_representation uses client.make_request so authentication stays on the Box client. It then polls get_file_by_id until the state is success or viewable.list_representations output:fetch_representation with rep_hint="[embedded_metadata]".Example when generation has not started:4. Write metadata back to the file
4. Write metadata back to the file
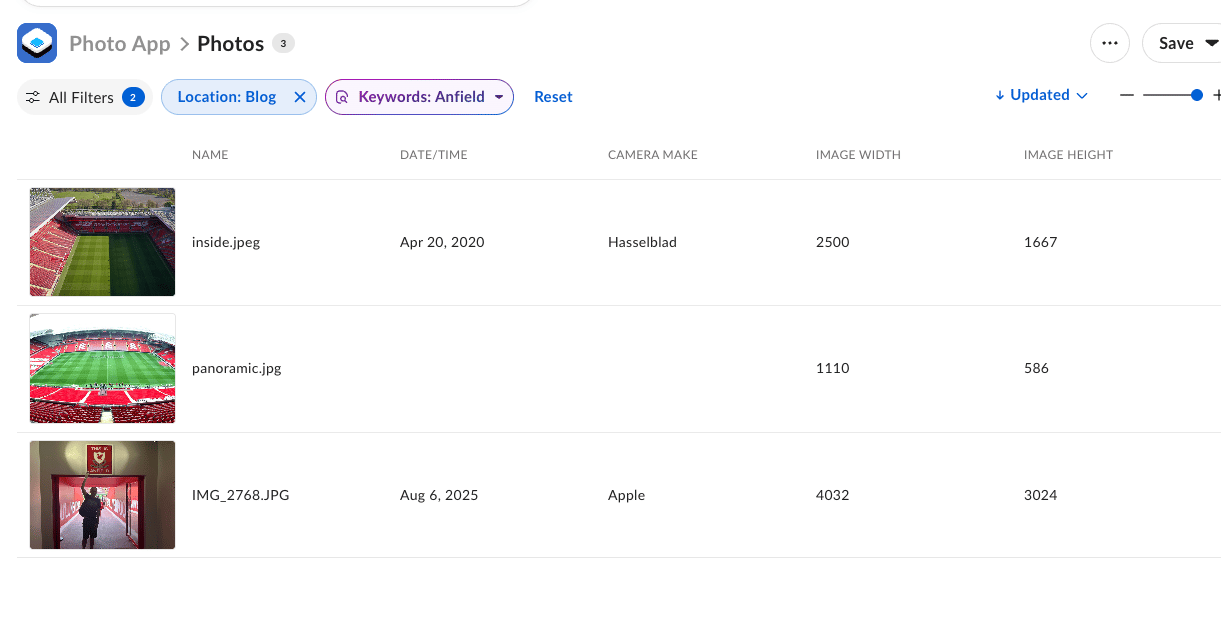
Create Missing fields are OK. Skip them. Once metadata is attached, the extracted fields become searchable, filterable, and visible in the Box web app. You can use to filter by camera make or ISO, or build dashboards in Box Apps.
metadata.py. After fetch_representation returns the JSON bytes, this module maps template keys to JSON paths, converts values to the template field types, and writes an enterprise metadata instance.Creating metadata only succeeds the first time. If the file already has an instance of the template, Box returns
409 Conflict on Metadata Instance, so this function falls back to a JSON-Patch update. That keeps the script safe to re-run on a file you already processed.Use the add operation rather than replace. add sets a value whether or not the field is already present, so the update still succeeds when a file omits some EXIF fields.5. Process every file in the folder
5. Process every file in the folder
Create At this point, your project directory should contain the following files:
process.py. This lists image files in BOX_FOLDER_ID, fetches embedded_metadata for each one, and writes the mapped fields.Run and verify
Run the script against the folder you created in Before you start.-
Make sure you are in the
extract-exif-metadatadirectory, then start the script: -
Check the terminal output. You should see each file processed, the extracted field count, and a confirmation that metadata was created or updated:
- Open a file in Box and select the Metadata tab to verify the values were written correctly.
Filter in a Box Apps dashboard
Add a Box Apps dashboard that uses the template. You can then see and filter images on the technical metadata you wrote.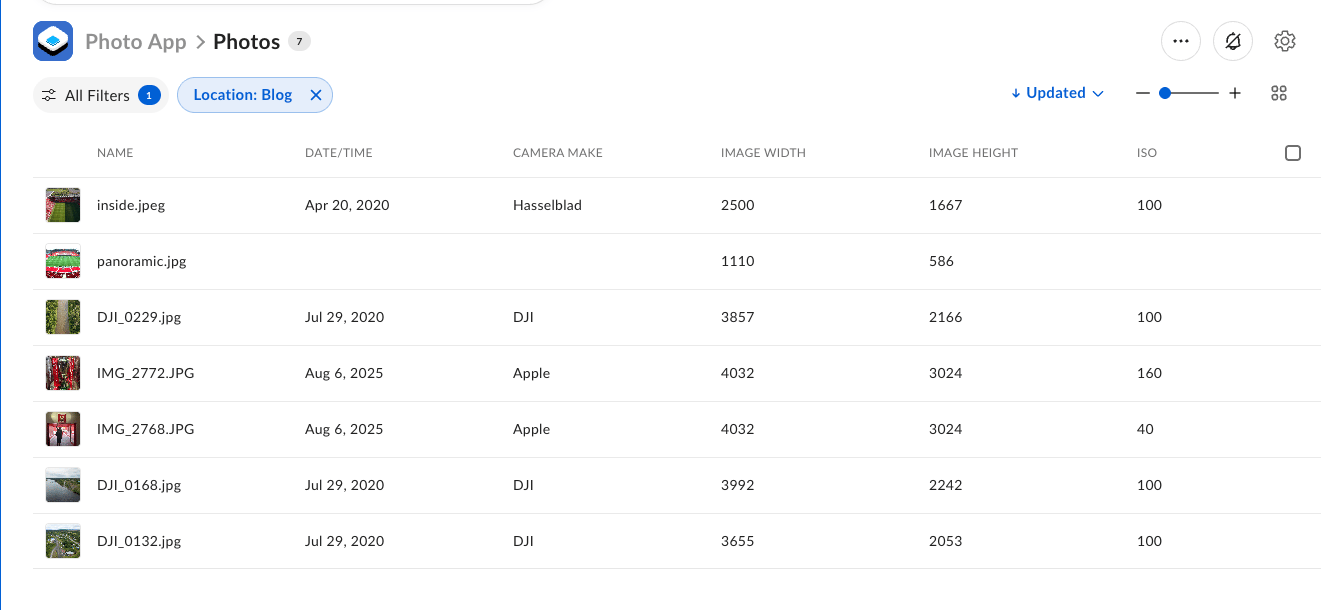
Troubleshooting
ModuleNotFoundError: No module named '...'
ModuleNotFoundError: No module named '...'
Your Python virtual environment is not activated. Run
source .venv/bin/activate from the project directory before running any python3 commands. Each new terminal tab needs its own activation.invalid_client: The client credentials are invalid
invalid_client: The client credentials are invalid
Check your
.env file:- Verify
BOX_CLIENT_IDandBOX_CLIENT_SECRETmatch the values in Developer Console > Configuration. - Confirm
BOX_ENTERPRISE_IDis your enterprise ID (found in Admin Console > Account & Billing, or Developer Console > icon in the top-right > Copy Enterprise ID). - Ensure your app is authorized in the Developer Console.
- Make sure the app type is Client Credentials Grant.
404 Not Found
404 Not Found
The service account does not have access to the file or folder. Invite the service account email (found in Developer Console > General Settings) as a collaborator with the Editor role on the folder containing your image files.
Timed out after 30s waiting for representation
Timed out after 30s waiting for representation
embedded_metadata is generated on demand. Wait a few seconds and re-run the script. Confirm the file type is one Box can .Extracted 0 of 8 fields
Extracted 0 of 8 fields
Not every file includes every EXIF, XMP, or ICC field. That is expected. Check the downloaded JSON for the categories that file actually contains, then adjust
EMBEDDED_METADATA_FIELD_MAP if you need different paths.409 Conflict on Metadata Instance
409 Conflict on Metadata Instance
The file already has an instance of the template, so creating one fails. This is common when you retest a file that a previous run already processed.Add the 409 fallback shown in Build by hand under 4. Write metadata back to the file so the script updates the existing instance instead of creating a second one.
The agent tried to create the template or folder
The agent tried to create the template or folder
The template, photos folder, and enterprise ID come from Before you start. An agent cannot create them. Re-paste the prompt with the prerequisites block intact so the agent reads
BOX_METADATA_TEMPLATE_KEY, BOX_FOLDER_ID, and BOX_ENTERPRISE_ID from the environment, or follow Build by hand.Next steps
Invoice intake automation
Run extraction from a webhook so files are tagged as they arrive, instead of on demand.
Content Explorer metadata view
Embed a filterable metadata dashboard in your own app.